

Here's the gist of how to put the box together.
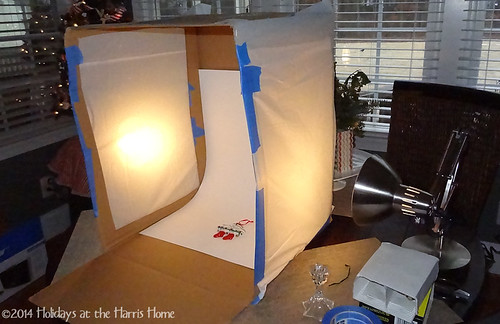
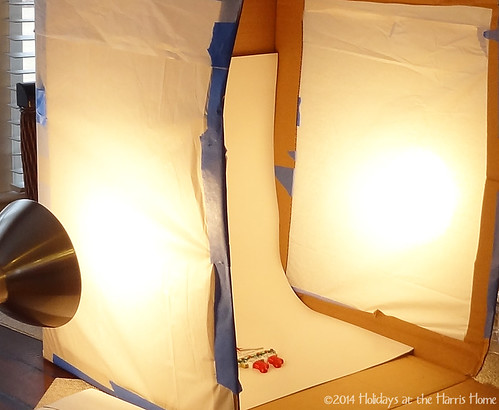
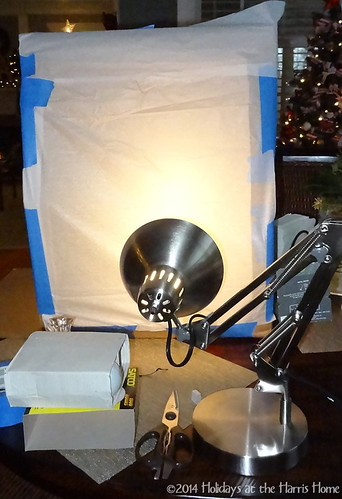
Find a cardboard box that's at least 1.5' x 1.5' x 1.5' in dimensions, slightly larger would be ok. Lay the box on its side so that the top of the box is facing you like a cave. Leave the flaps as is for now, to keep the box stable until construction is complete. Next, cut out rectangular holes in the two opposite sides of the box, leaving about 2" on each border. You want the opposite sides of the box to be large empty holes but they need some structural support with the border. Next, cover each side hole with white tissue paper. I used ordinary gift wrap tissue paper out of my Christmas wrapping paper stash. I just used blue painter's tape to put things together. Take care not to rip the tissue paper. You want to create a thin but opaque window on opposite sides of the box. Once the sides have been created, you can now cut off three of the flaps that were the original top flaps of the box. I kept one flap to serve as workspace on the floor of the box.
Next, take a clean, new piece of white poster board and cut it to the width of the box. Lay the poster board in the box with a gentle curve, part of the poster board going up the back of the box, and part of the poster board serving as the floor of the box. (am I making any sense?) Keep the gentle curve so that there's no corner. This will make a nice fade-away effect as background for your photos.
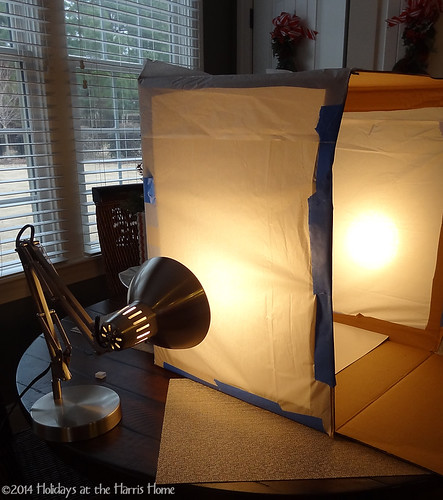
Final step is to place a 100-watt lamp on each side of the box, facing the box and directing light right onto the window. The light will be diffused, but will create a nice bright interior in the box. You should be able to take photos of your items using no flash. You may need to do some post-processing of your photos to brighten them up a little.
Here are some photos of my set-up, in case my instructions were clear as mud! As you can see, I have set this up on my kitchen table, but it can easily be moved around to other work surfaces as needed. I'm betting my tissue paper may tear, or it might even brown with long use under the hot lights. But it should be easy enough to replace when necessary.
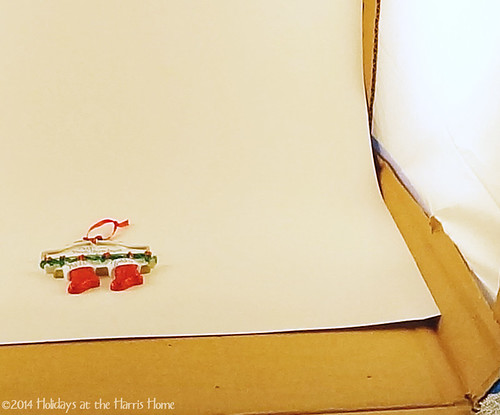
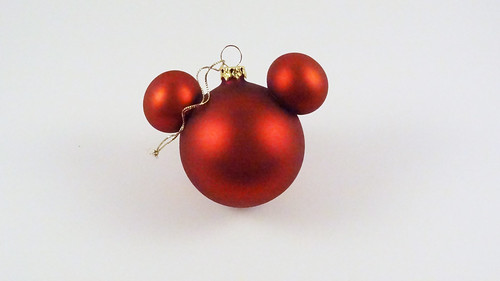
And here are some finished photos using the box. I don't have a super fancy camera - I'm using a decent point-and-shoot on auto settings, and I edited the photos a little bit to brighten up the white. I think this set-up will serve me well for my purposes.

Have you used a light box to photograph objects? Do you have any tips or suggestions? I'd love to hear from you! Please do leave a comment to share your thoughts.
_____________________________________________________
Linking to:
Be Inspired Friday - Common Ground
Feathered Nest Friday - French Country Cottage
Fabulously Creative Friday - Jennifer Rizzo
Frugal Friday - The Shabby Nest
No comments:
Post a Comment