
A few months ago, I found an old end table at a local thrift store that I thought might make a cute makeover project. For $20, it was a great piece. It was in really good condition, except for some coffee rings and scratches on the top. It was so serviceable, in fact, that I used it in our living room all winter long just as I found it at the thrift store!

But all along I had in mind to give it a makeover, so one day that's what I did!
I started by using a palm power sander to sand the polyurethane finish off of the top. I sanded down to bare wood on the top because I wanted to get rid of the scuffed and damaged clear coat, but wanted to keep the natural wood tone of the top. I also lightly sanded all the side surfaces, but didn't go down to bare wood on those (at least not on purpose... though sometimes it happened anyway).

Next, I used a tack cloth to wipe off all dust particles. No, not a very exciting photograph, I know, but hey, I'm trying to be thorough. ;-)

OK, so then it was time to stain the top of the table. Here are the things I used:

I just dipped the sponge brush into the stain, and wiped it on.

After letting it set very briefly, I wiped it off with a cotton rag.

I worked like this on the entire top piece a little section at a time.

Luckily I didn't have any trouble with the stain going darker where the sections overlapped.

I continued this way until the whole top was stained. I didn't think it was dark enough, so I repeated the process. It only took about 30 minutes total. Eventually, I had the whole top stained like I liked it. The curved beveled edges weren't sanded very well, but the stain color just happened to match pretty nearly perfectly, so that was a happy accident.

So here's what it looked like after the top was stained. The top took on a slightly redder hue than it had originally, and of course, the shiny thick clear coat is no longer on the top.

With the top stained, it was time to paint the bottom. Here is what I used. I asked the guy at the paint counter in Lowes to mix the darkest, purest, blackest black he could mix. I got it in a satin finish to give the piece a little luster without being all glossy.

And I just started painting. I used a sponge brush on this part too. It was pretty easy!

I really liked how it ws turning out, even with the first coat being a little transparent.

I continued this way on the rest of the bottom of the table.

At this point, I could see that the choice of top stain and bottom black were EXACTLY perfect for what I wanted! I did another coat of black, and it was just right!

Finally, I did three coats of polyurethane on the stained top. I let each coat dry for at least 8 hours, one of them was overnight. I very lightly sanded between each coat. The result was a shiny but not too shiny top, one that resists spills but isn't too terribly glossy.


All finished, the table went back into its place in the living room and looks absolutely perfect!!!


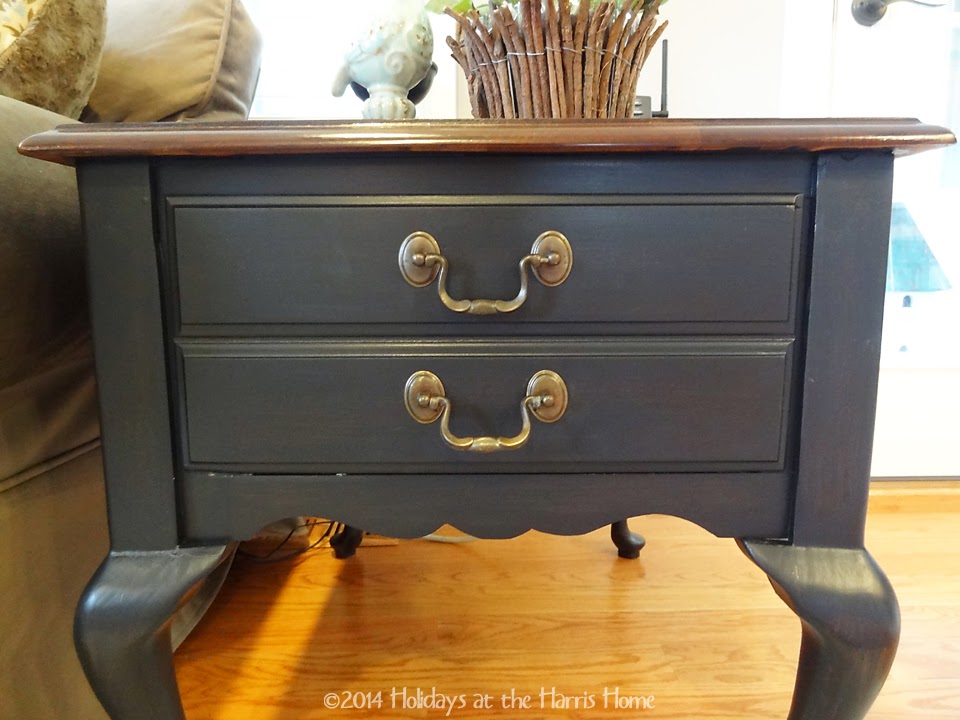

You can see how it blends and fits with the sideboard on the other side of the room, which also is black with a wood toned top. It also ties nicely to the baker's rack in the back right corner, which is black iron with a wood shelf.

(the photo above was taken a couple months ago... some changes have occurred in this room since then.)
Overall, I'm really pleased with this little end table makeover. It was pretty easy to do, and was a lot of fun!
Linking to:
It looks FABULOUS!!!! I just love it. I always love a touch of balck in any room! GREAT job!!
ReplyDeleteThanks Pinky! Thanks for stopping by - and great job on your gardening projects this past weekend. :-)
DeleteWow what a difference! I love the black with the wood grain top. Very classic. Great job!
ReplyDeleteThanks Lisa! I appreciate your kind comments. Hope you have a great day!
ReplyDeleteLove it's new look - super classy! Pinning on the Trash 2 Treasure Tuesday board. Thanks for sharing! :)
ReplyDeleteThank YOU for hosting the party! :-)
DeleteLove the black with the wood stained top. It looks great in your room. Great job!
ReplyDeleteKristi
Thanks Kristi! Thanks for stopping by, hope you have a great day!
DeleteI just stumbled upon your blog! I love this idea and am going to do the same to my end tables in my living room. My kitchen set is black with a cherry top so this should make a a great addition. I also live in Raleigh and just love it...so much to see and do...and the weather is great...except for the 94 degrees today!
ReplyDeleteThanks for stopping by and leaving your kind comment. Good luck with your tables! It was a fun project and I'm really happy with the way it turned out, hope you will be too. Hope to see you again!
DeleteI have another one of those in great shape. Came with glass top and a love seat and 2 side chairs text for pics and or offers
Delete